Adding Proxies
To start working in ZennoProxyChecker, you need to add proxies to the program (the Sources tab). You can do this in several ways.
Adding Using the Wizard
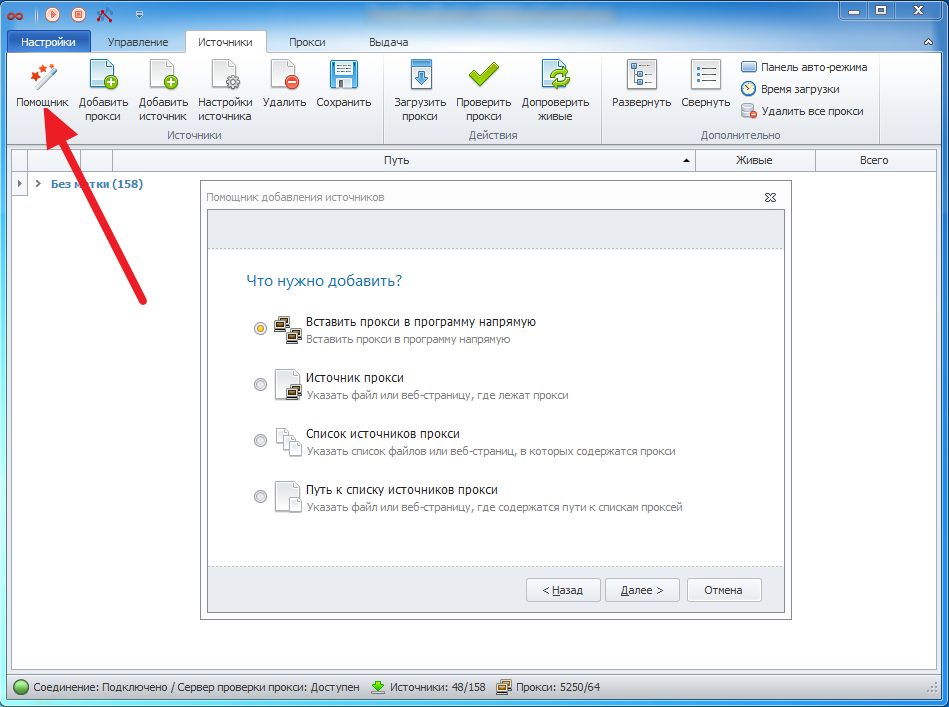
Proxies can be stored in different formats and forms—either in a file on your computer or on a web page as a list. To make adding proxies easier, the program includes a built-in Wizard that guides you step by step through the required actions:
Paste directly — paste the proxy address directly into the program.
Add source — specify a file or web page where the proxies are located.
Add list of sources — specify a list of files or web pages where the proxies are located.
Specify path to the proxy sources list — specify a file or web page that contains paths to proxy sources.
Adding Proxies Manually
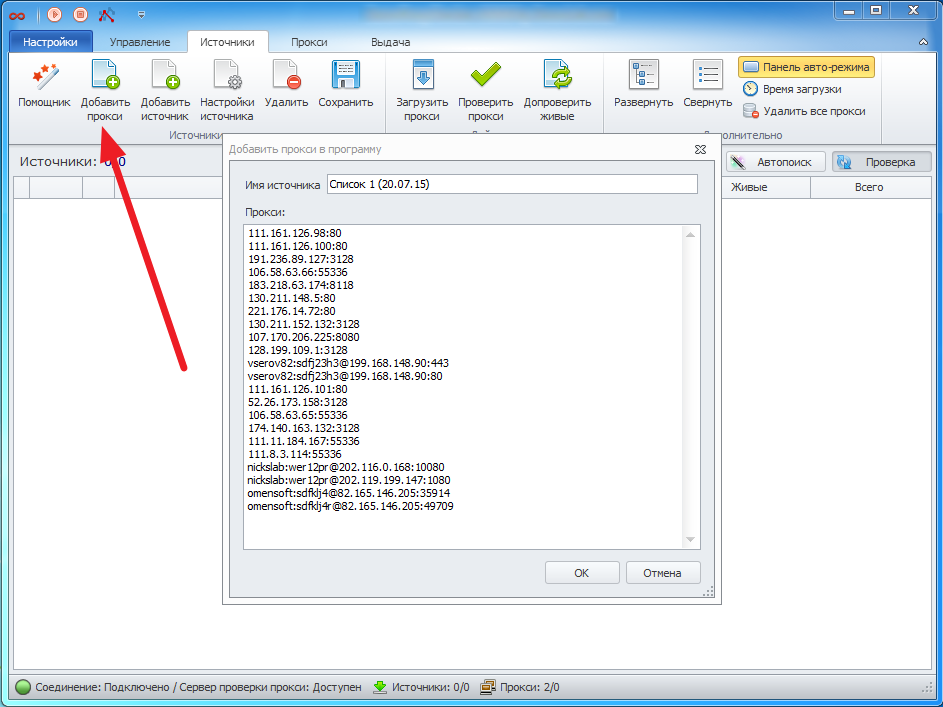
You can also add proxies manually using the Add proxy option — this pastes proxies directly into the program. The proxy address format is ip:port for regular proxies and username:password@ip:port for proxies with authentication.
Or use Add source by specifying the path to a file or the address of a web page containing a source/list of sources/list of paths to proxy sources.
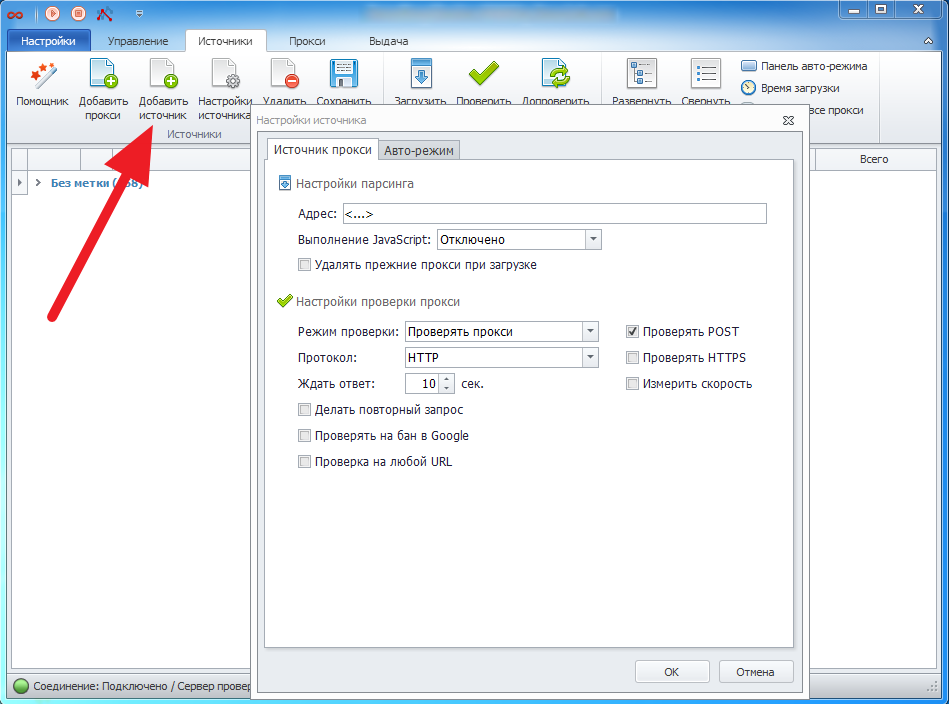
When adding a source, you can configure it by setting various parsing and proxy checking parameters.
Automatic Proxy Source Search
The program can automatically find proxy sources on the internet and add them to the program. To do this, enable the auto-search option on the Managing tab.
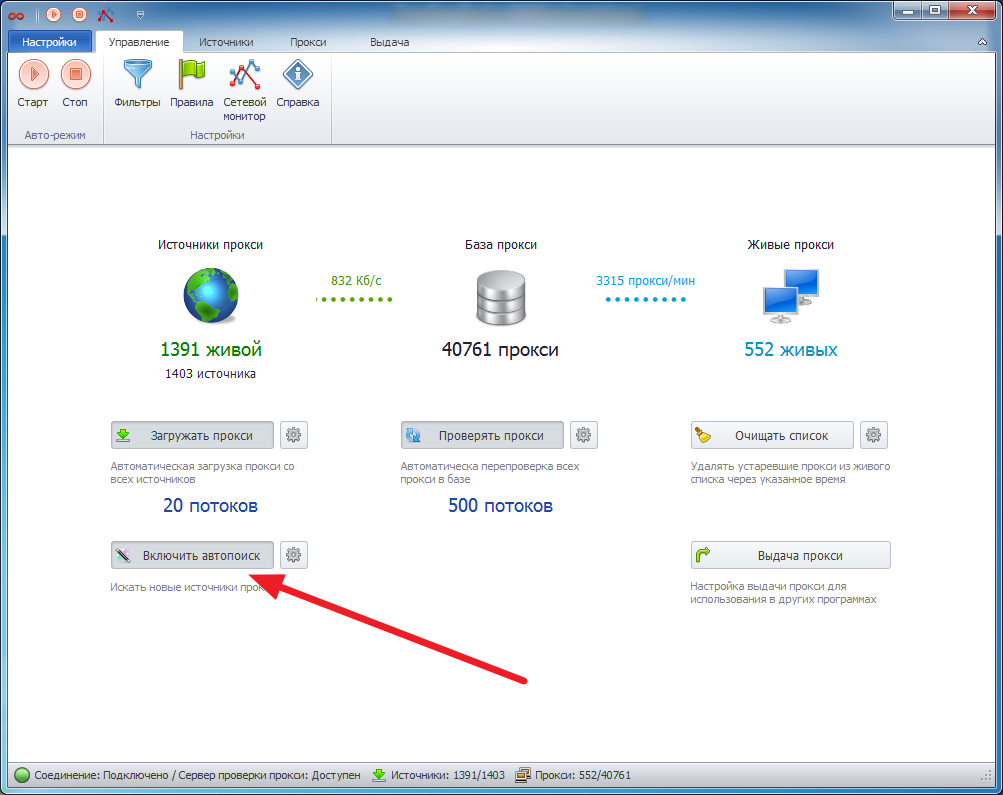
Sources found through auto-search will be added to the program and checked according to the auto-search settings specified in the main program settings.