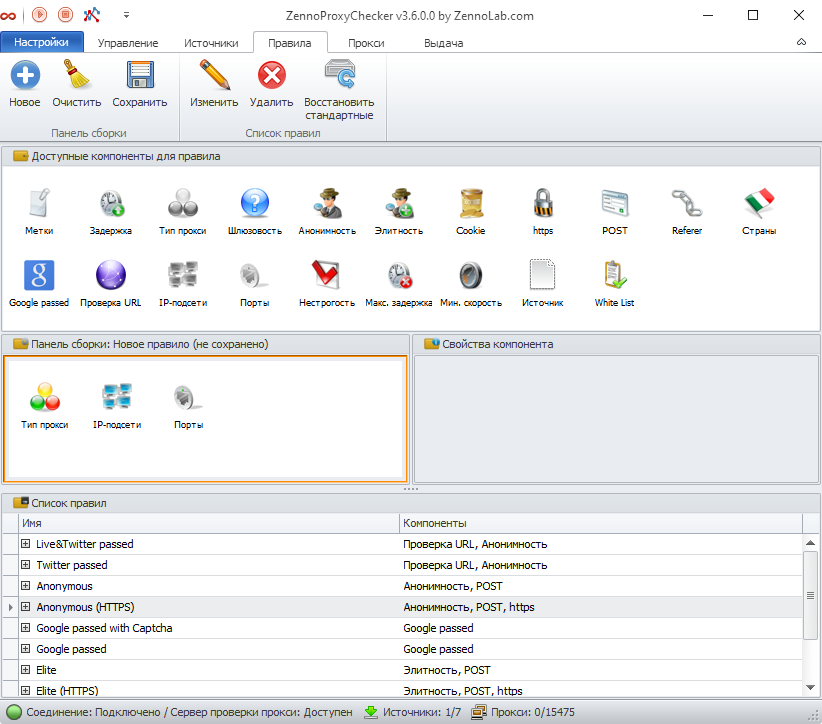
Rules
The Rules tab is предназначена for configuring the parameters that will later be used to select proxies.
Rules are a set of conditions used to select proxies from the list of “live” ones. In other words, rules are applied to proxies that have already passed verification. You can use rules to customize proxy output according to various criteria. For example, you may need only anonymous or elite proxies with maximum speed and minimum latency, not banned on Google and Twitter, only Russian proxies for working with Russian social networks, etc.
How to open?
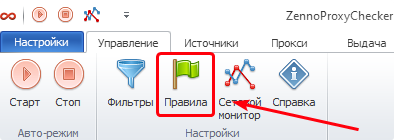
First method
Through the Managing tab.
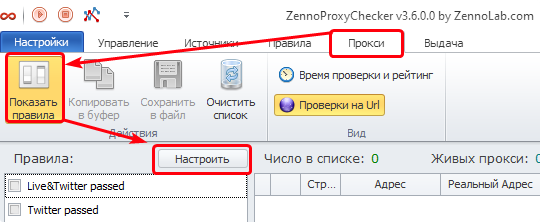
Second method
Through the Proxy tab.
Control Panel
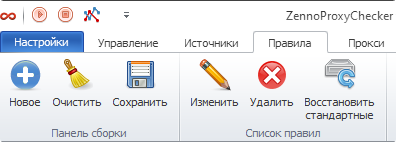
New
Allows you to create a new rule from scratch.
If there is an unsaved rule on the build panel (described below) at this moment, a dialog will appear prompting you to save the changes.
Clear
Using the Clear button, you can remove components from the Build Panel window.
Save
Allows you to save all the changes you have made.
Click the Save button and come up with a name for the rule. All saved rules, as well as the preset ones, can be found in the Rule List section at the bottom of the window.
Edit
To edit a rule, select it in the Rule List and click the Edit button. Its components will then be transferred to the Build Panel.
Delete
To delete a rule from the Rule List, select it and click the Delete button.
Restore defaults
Allows you to restore the default values for the built-in rules.
Rule List
This window displays all the rules added to the program. By clicking the “+” (plus) next to a rule name, you can view its details.
Build Panel
Components from the Available Components window are added here. You can add them by dragging and dropping.
Component Properties
This window displays the properties of the component currently selected in the Build Panel.
After dragging the required component from the Available Components window to the Build Panel, you can configure it. Let’s take the Tags component as an example. To activate the editing mode for this component’s properties, simply click it once. On the right side, in the Component Properties window, you will see the available editing options.
Components must be configured one by one, from left to right. If you have not configured the left component, you will not be able to move on to editing the ones located to its right.

The Component Properties window may not display all parameters completely. Therefore, before you start editing, expand the window downward as shown in the animation below.
Components Available for Rules

Tags
Proxy selection is performed based on tags.
List the tag names separated by ��“;” to specify which tags this Rule filter will apply to.
Latency
Proxies are sorted by latency in ascending order.
Proxies with lower latency appear first, and those with higher latency appear last.
Proxy Type
Specify the desired proxy type: http, socks4, socks5.
Gateway
Indicates whether the proxy is a tunnel.
If enabled, only gateway proxies will be selected.
If disabled, only non-gateway proxies will be selected.
To select both types, remove this component.
Gateway proxies are proxy tunnels for proxies.
Anonymity
Determines whether the proxy hides the user’s IP address.
Specify whether the proxy must be anonymous.
Anonymity (privacy, private) is a proxy attribute that determines whether the proxy hides the original IP address.
Elite
The proxy does not identify itself as a proxy — it does not transmit the HTTP_VIA parameter in the header.
Specify whether the proxy must be elite. An elite (high anonymous) proxy does not transmit the HTTP_VIA parameter in the header (does not reveal itself as a proxy).
Cookie
Cookie support.
Specify whether the proxy must support transmitting cookies in the header.
https
HTTPS support.
Specify whether the proxy must support connections via the HTTPS protocol.
POST
POST support.
Specify whether the proxy must support transmitting POST in the header. POST transmission is very often required for submitting forms.
Referer
Specify whether the proxy must support transmitting the Referer in the header.
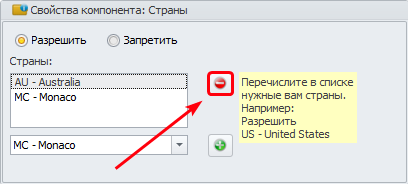
Countries
Allow — only countries from this list will be selected.
Deny — proxies from the listed countries will be ignored.
How to add a country?
Click the drop-down list, find the required country, select it, then click the green “+” (plus) next to the list. Repeat this for each required country.
Removing a country from the list
To remove a country, select it in the list of added countries and click the “-” (minus) button.
Google passed
Checks for a ban in the Google search engine.
When the Successful request parameter is enabled for Google, a second parameter — Allow response in the form of a captcha — becomes available for activation.
URL Check
Allows you to test a proxy’s functionality on a specific URL.
Choose an option: Allow or Deny.
You can add new URLs for checking via Source Settings.
Add/Delete
The process of adding and deleting rules is the same as for Countries (described above).
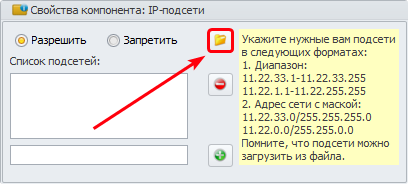
IP Subnets
Sets restrictions on acceptable proxy IP addresses using a list of subnets.
Specify the required subnets in the following formats:
Range
11.22.33.1-11.22.33.255
11.22.1.1-11.22.255.255
Network address with mask
11.22.33.0/255.255.255.0
11.22.0.0/255.255.0.0
Subnets can be loaded from a file. To do this, click the file icon (1) and select a file with subnets from your computer.
Add/Delete
The process of adding and deleting rules is the same as for Countries (described above).
Ports
Sets restrictions on proxy ports.
Enter port numbers or their ranges separated by semicolons.
Example: 80;1000 - 1080;8080
You can Allow or Deny a port by selecting the appropriate option.
Non-strict
Makes the rule non-strict. If no suitable proxies are found, gateway proxies will be used.
Max. latency
Filter by maximum proxy latency.
Defines the maximum allowable proxy latency in seconds. All proxies with higher latency will be excluded.
Min. speed
Filter by minimum proxy speed.
Defines the minimum allowable proxy speed. All proxies with lower values will be excluded.
Source
Select proxies by source. Add the proxy source address/path.
White list
Check against blacklists.

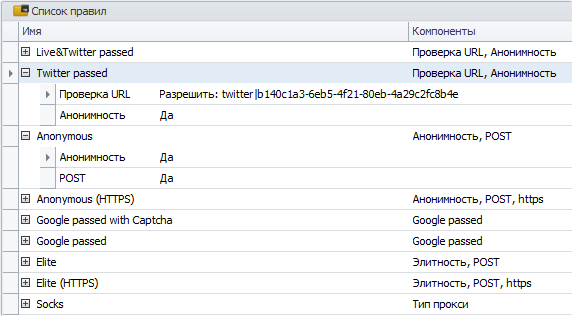
Frequently Used Rules
The program already includes a set of the most commonly used rules for proxy selection.
Live&Twitter passed — anonymous proxies not banned on Windows Live and Twitter.
Twitter passed — anonymous proxies not banned on Twitter.
Anonymous — anonymous proxies that support POST requests.
Anonymous (HTTPS) — anonymous proxies that support POST requests and HTTPS connections.
Google passed with Captcha — proxies not banned on Google, confirmed using a captcha.
Google passed — proxies not banned on Google.
Elite — elite proxies that support POST requests.
Elite (HTTPS) — elite proxies that support POST requests and HTTPS connections.
Socks — SOCKS-type proxies.